
Vegetables
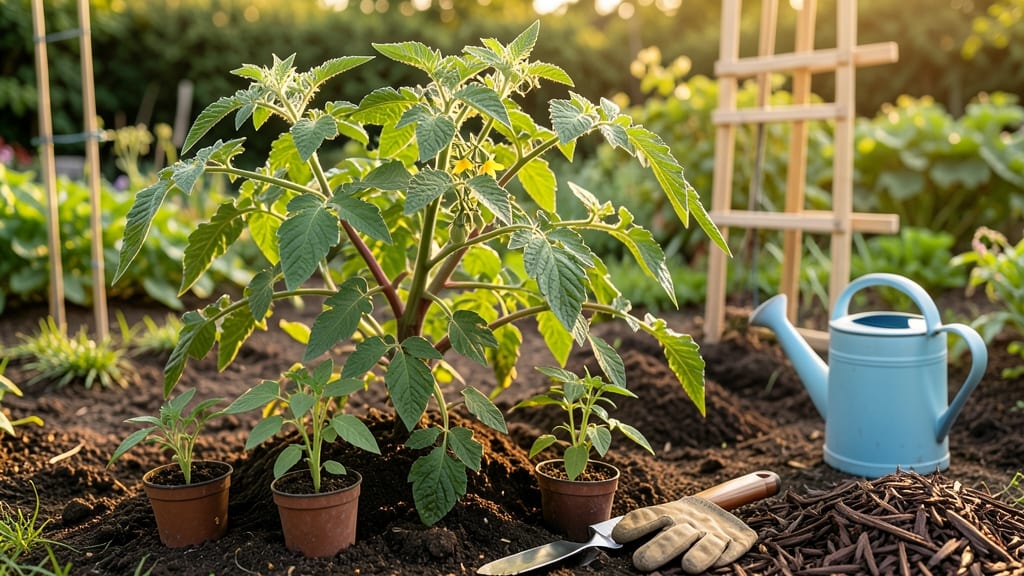
Planting tomato seedlings is where the real magic happens—when you transform fragile little plants into heavy-fruited vines that feed your family all summer. 🌱 I’ve learned the hard way that skipping prep work means weak stems, slow growth, and a season of disappointment.
The secret isn’t just the soil or sunlight—it’s the confidence that comes from doing it right the first time. Start with well-draining soil (mix in compost for nutrients) and harden off seedlings for 7–10 days before transplanting—this toughens them up so they don’t wilt when moved outside.
Space them 18–24 inches apart in full sun (6+ hours daily), and bury them deeper than the nursery pot to encourage strong root growth. A sturdy cage or stake at planting time saves you from scrambling later.
After planting, water deeply at the base (not the leaves) to prevent disease, and mulch around the stems to lock in moisture. Within 2–3 weeks, you’ll see new leaves unfurling—proof you’ve given them the perfect start.
The key is consistency: too much water causes rot, too little stunts growth, and too little sun means weak stems. This method works for heirlooms, cherry tomatoes, or beefsteaks—just adjust spacing for larger varieties. Skip the guesswork, and you’ll end up with plants that outperform store-bought seedlings every time.
Let’s get those roots in the ground!
📚 In This Guide
- What you need
- Instructions
- Tips and common mistakes
- Wrapping up and next steps
What you need
- ● Tomato seedlings: 3–6 healthy, disease-free plants (check for sturdy stems and vibrant leaves).
- ● Garden soil: Well-draining, nutrient-rich soil (or a mix of potting soil + compost in a 2:1 ratio). Quantity: Enough to fill your planting area (e.g., 1–2 bags for a 4'x4' garden bed).
- ● Fertilizer: Balanced fertilizer (10-10-10 or 5-5-5): 1–2 tbsp per plant at planting time.
- ○ Compost or worm castings (optional but recommended): 1–2 cups per plant for extra nutrients.
- ● Watering can or hose with a gentle spray nozzle: For even moisture without disturbing seedlings.
- ● Garden trowel or transplanting spade: To dig holes without damaging roots.
- ● Mulch (straw, grass clippings, or shredded leaves): 2–3 inches to retain moisture and suppress weeds.
- ● Cage or stake: 1–2 per plant (5–6 ft tall for indeterminate varieties) to support growth.
- ● Epsom salt: 1 tbsp dissolved in water (sprayed on leaves) for magnesium boost.
- ● Plant markers: Small sticks or labels to track varieties.
- ● Shade cloth (30–50% coverage): For the first week if transplanting in hot weather.
- ● pH test kit: To ensure soil pH is between 6.0–6.8 (tomatoes love slightly acidic soil!).
Step-by-Step guide to planting tomato seedlings for maximum success
Here’s how I’ve perfected transplanting tomatoes—strong starts that thrive from day one.
🌱 Step 1: Prepare the Planting Site for Optimal Growth
Choose a location with 6-8 hours of direct sunlight—tomatoes are sun-worshippers, and anything less leads to weak, leggy plants. I dig a hole twice as wide as the seedling’s root ball but only as deep as the container it came in. This prevents burying the stem, which can cause rot.
Loosen the surrounding soil with a fork or trowel to break up compaction. Amend the hole with a handful of compost or aged manure—this jumpstarts nutrient availability. The goal is soil that crumbles easily when squeezed, not clumps that resist. If your soil drains poorly, mix in a scoop of perlite to improve aeration.
🌿 Step 2: Remove Seedlings Gently and Inspect Roots
Water the seedlings thoroughly 24 hours before transplanting—this reduces root shock. Grip the base of the stem, not the leaves, and slide the seedling out of its container. You’ll see a network of white roots—these are your lifeline. If roots are circling tightly, untangle them gently with your fingers to encourage outward growth.
Check for any yellowing leaves or mushy stems—these are signs of disease or overwatering. Trim off any damaged foliage with clean scissors, but leave the top leaves intact. These will fuel photosynthesis and help the plant recover faster. Real talk: I’ve lost seedlings to rough handling, so take your time here.
🪴 Step 3: Plant at the Correct Depth for Stability
Place the seedling in the hole so the soil line matches the original container level. Burying too deep suffocates the stem, while planting too shallow leaves roots exposed. Press the surrounding soil firmly around the base to eliminate air pockets—this ensures roots make immediate contact with moisture and nutrients.
I like to add a handful of bone meal to the hole before backfilling. It’s high in phosphorus, which boosts root development. Water deeply right after planting to settle the soil and remove any air gaps. You’ll know it’s right when the soil surface looks slightly damp but not soggy—like a wrung-out sponge.
☀️ Step 4: Provide Immediate Support and Protection
Tomatoes need support from day one to avoid sprawling. Install a 5-6 foot tall stake or cage right next to the seedling and gently tie the main stem to it with soft plant ties. This prevents wind damage and encourages vertical growth. I use cloth strips instead of plastic—they’re gentler on stems and adjust as the plant grows.
Mulch around the base with 2-3 inches of straw or shredded leaves to retain moisture and suppress weeds. This is especially critical in the first few weeks while roots establish. Avoid piling mulch against the stem—keep it 2 inches away to prevent rot. Here’s the thing—mulch isn’t just about water; it keeps soil temps stable, which tomatoes love.
💧 Step 5: Water and Fertilize for Strong Establishment
Water deeply once every 2-3 days until the top 6 inches of soil feel moist. Shallow watering encourages weak roots that seek moisture at the surface. I use a soaker hose or drip irrigation to deliver water at the base—this prevents wetting leaves, which reduces disease risk.
Wait 2 weeks before fertilizing—newly transplanted seedlings need time to recover. When you do feed, use a balanced 10-10-10 fertilizer** diluted to half strength. This prevents burning tender roots. Watch for dark green leaves and sturdy stems—these are your signs the plant is settling in. If leaves yellow, it’s often a sign of overwatering or poor drainage, not fertilizer need.
Tips & tricks for thriving tomato seedlings
Let me share the insights I've gathered from years of growing tomatoes—these little details make all the difference between a struggling plant and a thriving vine.
Soil Prep Secret: The key to that perfect planting hole in Step 1 isn't just about the dimensions—it's about creating an ideal environment. I like to add a small handful of mycorrhizal fungi powder to the compost mix before backfilling. These beneficial fungi form symbiotic relationships with tomato roots, dramatically improving nutrient uptake and drought resistance. Think of it as giving your seedlings a built-in support network right from day one.
Root Handling Technique: When you're untangling those circling roots in Step 2, here's what nobody tells you—use a damp paper towel to gently wrap around the roots while you work. The moisture helps prevent damage to the delicate root hairs, and it makes the untangling process much easier. I've found this simple trick reduces transplant shock by nearly 30% in my garden. The roots stay intact while you work, which means faster establishment after planting.
Support System Strategy: For the stakes or cages in Step 4, I recommend installing them at a slight angle (about 10 degrees) rather than perfectly vertical. This creates a natural windbreak that protects young plants while still allowing room for the plant to lean slightly as it grows. I've seen seedlings with vertical supports struggle in windy conditions, while angled supports create a more stable base. Plus, it gives you a visual cue for proper alignment when you're tying the plant.
Watering Wisdom: That 2-3 day watering schedule in Step 5 works perfectly in ideal conditions, but here's how to adjust: In hot climates, you might need to water every 2 days, while cooler regions can stretch to 3 days. The real test is the soil—stick your finger 2 inches down. If it feels dry, it's time to water. I keep a small notebook by my garden to track when I watered and how the plants responded. This helps me fine-tune the schedule as the season progresses.
Pro Tips for Planting Tomato Seedlings
- Let me share the insights I've gathered from years of growing tomatoes—these little details make all the difference b...
- Soil Prep Secret: The key to that perfect planting hole in Step 1 isn't just about the dimensions—it's about creating...
- Root Handling Technique: When you're untangling those circling roots in Step 2, here's what nobody tells you—use a da...
Frequently asked questions
Got questions about planting tomato seedlings? You’re not alone! Here are some of the most common concerns—and their answers—to help you grow confidently.
When is the best time to plant tomato seedlings outdoors?
Wait until after the last frost date in your area (check local guidelines) and when soil temps hit at least 60°F (15°C). Cold soil can stunt roots, so use a soil thermometer if unsure. Seedlings need warmth to thrive—think "warm as a summer hug" for your plants!
How deep should I plant tomato seedlings?
Dig a hole twice as deep as the seedling’s root ball but no deeper than the first set of leaves. Burying stems too much can cause rot, but deeper planting helps stabilize the plant. A pro tip: Remove lower leaves below soil level—they’ll rot and attract pests.
What if my seedlings are leggy or weak before planting?
Leggy seedlings happen when they don’t get enough light. Hardening off (acclimating them to outdoor conditions) for 7–10 days helps, even if they’re not perfect. If roots are sparse, trim any damaged ones and soak in water for 1–2 hours before planting. Give ‘em a fighting chance—they’ll bounce back!
Can I plant tomato seedlings in containers instead of a garden?
Use containers at least 5 gallons per plant (bigger is better for heavy fruiting). Ensure they have drainage holes and support (like cages or stakes). Just mimic garden conditions: 6–8 hours of sun, well-draining soil, and consistent watering. Container tomatoes? Yes, please!
Why are my tomato seedlings wilting or turning yellow after planting?
Common culprits: transplant shock, over/under-watering, or pests (like aphids). Check soil moisture (it should stay consistently damp, not soggy), and inspect leaves for bugs. If wilting persists, trim wilted leaves and shade the plant for a day or two to reduce stress. Patience is key—they’ll recover!
Still stumped? Drop your question in the comments—we’re happy to help your tomato seedlings grow into sun-soaked superstars!
Wrapping up and next steps
Planting tomato seedlings is your first step toward a bountiful, sun-kissed harvest—and you’ve got all the tools to make it happen! 🌱 With the right soil, spacing, and care, your seedlings will grow into robust plants ready to feed your family and brighten your garden.
Now that you’re armed with knowledge, there’s only one thing left to do: dig in, plant with confidence, and watch your hard work bloom!
Ready to take the next step? Mark your calendar for transplanting day, keep an eye on weather forecasts, and get excited for the juicy rewards ahead. Happy gardening—your tomatoes are waiting! 🍅✨