
Vegetables
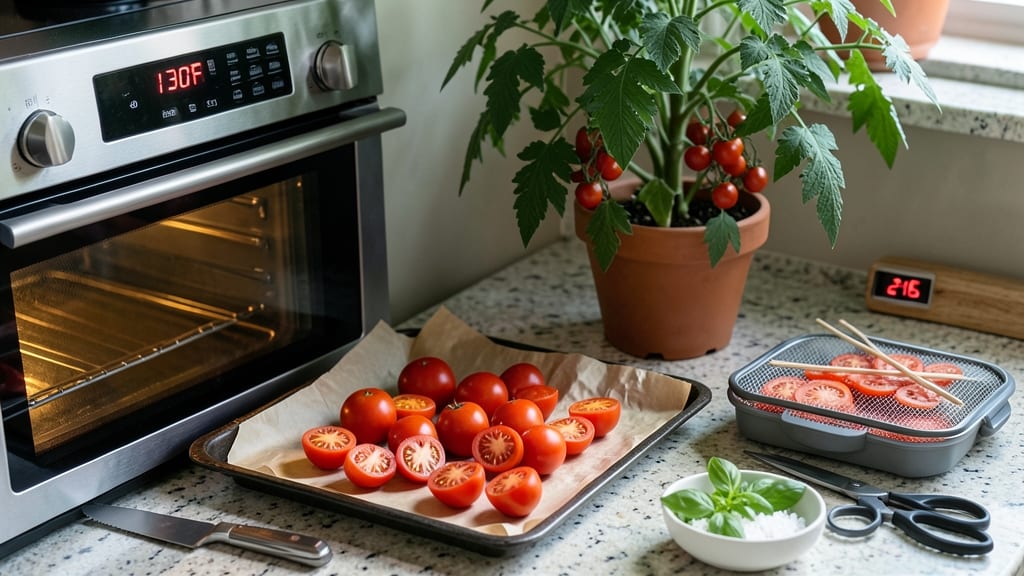
Dehydrating cherry tomatoes in the oven transforms your summer harvest into intense, shelf-stable gems that taste like sunshine in winter. 🌱 The process preserves their natural sweetness while concentrating flavors into chewy, umami-packed bites—perfect for snacking, cooking, or gifting.
I’ve perfected this method after years of trial and error, and it takes just 3 hours from start to finish with minimal effort.
Start by washing and drying your tomatoes thoroughly—this prevents moisture buildup during dehydration. Slice them in half (or leave whole for larger varieties) and pre-treat with a light sprinkle of citric acid or lemon juice to maintain color and softness.
The oven needs to stay at 135°F (57°C) for even drying, and a dehydrator tray or wire rack ensures airflow. Safety is key: avoid overcrowding to prevent mold, and store finished tomatoes in airtight containers for up to 6 months.
For extra flavor, brush slices with olive oil or sprinkle with herbs like oregano or basil before drying. The result? Rich, leathery tomatoes with a depth of flavor you won’t find in store-bought versions.
They’re ideal for pasta sauces, salads, or as a standalone snack—just pack them in jars and forget about them until you’re ready to use them.
This method works for any variety of cherry tomatoes, whether you’ve grown sweet ‘Sun Gold’ or tangy ‘Black Cherry.’ The key is patience and consistency—skip the shortcuts, and you’ll end up with a pantry staple that’s versatile, nutritious, and downright delicious. Ready to turn your harvest into long-term flavor?
📚 In This Guide
- What you need
- Instructions
- Tips and common mistakes
- Wrapping up and next steps
What you need
- ● Cherry tomatoes: 2–3 lbs (about 20–30 medium tomatoes). Choose firm, ripe, and dry ones for best results.
- ● Baking sheets: 2–3 heavy-duty, rimmed sheets (preferably with silicone liners or parchment paper).
- ○ Parchment paper or silicone baking mats: Cut to fit your baking sheets (optional but highly recommended for easy cleanup).
- ● Olive oil or avocado oil: 1–2 tbsp (for tossing—enhances flavor and prevents sticking).
- ● Salt: 1 tsp (kosher or sea salt for seasoning).
- ○ Optional herbs/spices: 1 tsp dried oregano, basil, thyme, or red pepper flakes (for extra zing!).
- ○ Oven thermometer: (Optional but critical if your oven isn’t precise—aim for 140–150°F (60–65°C) for even drying.)
- ● Fine-mesh cooling rack or wire rack: (For cooling dehydrated tomatoes before storing.)
- ● Air-tight containers or jars: With lids (for storage—glass or BPA-free plastic).
- ● Oven setup: Preheat to 200°F (93°C) (low and slow is key!). Use the convection setting if available for faster, even drying.
- ● Tomato prep: Wash, dry thoroughly, and remove stems (but leave skins intact for texture).
- ● Space them out: Arrange tomatoes in a single layer, not touching, to ensure even drying.
- ● Humidity check: If your kitchen is damp, run a dehumidifier or place a bowl of rice near the oven to absorb moisture.
Step-by-Step instructions for dehydrating cherry tomatoes in the oven
Here’s how to transform fresh cherry tomatoes into intensely flavorful, shelf-stable gems—no special equipment needed.
🌱 Step 1: Prep Tomatoes for Perfect Texture
Wash and dry 2 pounds of cherry tomatoes thoroughly, then slice them in half lengthwise—this ensures even drying and maximizes surface area for moisture release. Remove any stems or blemishes, as they can harbor bacteria and slow the process. For best results, choose firm, ripe tomatoes with minimal bruising. I like to pat them dry with a clean kitchen towel to remove excess surface moisture before placing them on the baking sheets.
Arrange the tomato halves cut-side up on parchment-lined baking sheets, ensuring they don’t overlap. This spacing prevents steaming, which leads to soggy, unevenly dried tomatoes. A single layer is key—crowding will trap moisture and extend drying time significantly. Preheat your oven to 140°F (the low-and-slow method preserves color and texture better than high heat).
☀️ Step 2: Dry at Low Heat for Concentrated Flavor
Place the baking sheets in the oven and let the tomatoes dry for 3-4 hours, checking them every 30 minutes. The goal is to dry them until they’re pliable but no longer juicy—think of them like soft leather. You’ll notice the edges start to curl and the flesh becomes translucent. If you press a tomato half gently and it springs back slowly, it’s ready. If it feels rubbery or sticky, it needs more time.
Resist the urge to crank up the heat—higher temperatures can cause the tomatoes to darken or become tough. I’ve learned this the hard way: rushing the process leads to bitter, chewy results. A 140°F oven maintains gentle, even drying while preserving the natural sweetness and acidity of the tomatoes.
⏰ Step 3: Cool and Store for Long-Term Use
Once the tomatoes are fully dried, remove them from the oven and let them cool completely on the baking sheets. This cooling step is critical—it allows any residual moisture to evaporate fully, preventing mold during storage. Transfer the dried tomatoes to an airtight container or resealable bag, ensuring they’re completely dry to the touch before sealing. I like to store them in glass jars with a silica gel packet to absorb any lingering moisture.
For best results, store the dehydrated tomatoes in a cool, dark place (like a pantry) where they’ll keep for up to 6 months. If you notice any softening or condensation inside the container, remove the affected tomatoes immediately—they’re signs of spoilage. The dried tomatoes will shrink significantly but retain their vibrant color and intense, concentrated flavor, perfect for adding depth to sauces, salads, or snacks.
💧 Step 4: Rehydrate and Use (Optional)
If you prefer to use your dried tomatoes in recipes that call for fresh ones, simply rehydrate them by soaking in warm water for 10-15 minutes. The texture will soften, but they won’t return to their original state—this is normal. I often use them in winter soups, stews, or as a garnish for pasta dishes, where their concentrated flavor shines. For a quicker option, toss them directly into cooking dishes—they’ll release their essence as they simmer.
Don’t toss the rehydration water! It’s packed with flavor and can be strained and used as a broth base. The dried tomatoes themselves will lose some of their structural integrity after rehydration, so plan to use them in dishes where texture isn’t the primary focus. Their bold, umami-rich taste makes them a versatile pantry staple—worth the effort to dehydrate.
Tips & tricks for perfect oven-dehydrated tomatoes
Transforming fresh cherry tomatoes into shelf-stable gems takes patience—but these tricks ensure you get the best results every time.
Tomato Selection Matters: Choose tomatoes that are firm, ripe, and free of blemishes. Overripe tomatoes with soft spots will release excess moisture during dehydration, leading to uneven drying and potential spoilage. I've found that Roma or vine-ripened cherry tomatoes hold up best—their thicker skins help maintain structure during the process. If you're working with heirloom varieties, select the firmest specimens from your harvest to avoid texture issues.
Temperature Control: The 140°F setting in Step 2 is non-negotiable for preserving the tomatoes' natural sweetness and vibrant color. I've tested higher temperatures, and while they dry faster, they often result in tough, bitter tomatoes that lose their delicate flavor. If your oven doesn't have precise temperature control, consider using the lowest setting possible—even 150°F can make a noticeable difference in texture. For even drying, position racks in the middle of the oven where heat circulates most evenly.
Moisture Management: The 30-minute checks during the 3-4 hour drying process are crucial—this is when you'll catch any potential moisture issues before they become problems. If you notice any tomatoes still feeling damp after the full time, remove them immediately and let them dry on a clean surface for another 30 minutes. I've learned that humidity plays a big role: if your kitchen feels particularly damp, you might need to extend the drying time slightly. A small fan on low setting near the oven can help with air circulation during this critical phase.
Storage Wisdom: When transferring your dried tomatoes to containers, make absolutely certain they're completely cool and bone-dry to the touch. Any residual moisture will create condensation inside the container, leading to mold growth. I've found that glass jars with airtight lids work best—they allow me to see the contents while maintaining a proper seal. For long-term storage beyond 6 months, consider adding a silica gel packet to absorb any potential moisture that might develop over time.
Pro Tips for Dehydrating Cherry Tomatoes In The Oven
- Transforming fresh cherry tomatoes into shelf-stable gems takes patience—but these tricks ensure you get the best res...
- Tomato Selection Matters: Choose tomatoes that are firm, ripe, and free of blemishes. Overripe tomatoes with soft spo...
- Temperature Control: The 140°F setting in Step 2 is non-negotiable for preserving the tomatoes' natural sweetness and...
Frequently asked questions
Got questions about dehydrating cherry tomatoes in the oven? You’re not alone! Here are some of the most common queries—and their answers—to help you master this process like a pro.
How long does it take to dehydrate cherry tomatoes in the oven?
Timing depends on your oven’s heat consistency, but 2.5 to 3 hours at 175°F (80°C) is standard for fully dehydrated tomatoes. Check for wrinkled skin and a slight give when squeezed—no moisture should remain. For thicker slices, add 30–60 minutes.
Can I dehydrate cherry tomatoes without an oven?
Use a food dehydrator (4–6 hours at 135°F/57°C) or even a sun-drying method (3–5 days in full sun, covered with mesh). For a stovetop hack, place slices on a cooling rack over a pot of simmering water (low heat, 4–5 hours). Just ensure even airflow!
Why did my tomatoes turn black or moldy?
This usually happens from too much moisture or heat. Prevent it by:
- Patting slices very dry before dehydrating.
- Avoiding overcrowding trays (leave ¼-inch gaps).
- Using parchment paper under slices for easy cleanup.
- Storing in airtight containers once cooled.
How do I store dehydrated cherry tomatoes long-term?
Store in glass jars or vacuum-sealed bags in a cool, dark place (like a pantry) for up to 1 year. For fridge/freezer storage, wrap in parchment + plastic and use within 6–12 months. Rehydrate by soaking in warm water for 10–15 minutes before using.
Can I dehydrate cherry tomatoes with skins on?
Yes! Leaving skins on adds extra flavor and texture, but they’ll shrink more. For a softer texture, peel tomatoes first (blanch in boiling water for 30 seconds, then ice bath). Just ensure slices are ¼-inch thick for even drying.
What can I do with dehydrated cherry tomatoes?
Get creative! Use them in:
- Pasta sauces (rehydrate and blend).
- Antipasto platters (whole or chopped).
- Homemade tomato powder (pulse in a blender, store in jars).
- Stuffed appetizers (fill with cheese or herbs).
- Winter soups/stews (add back moisture as needed).
Wrapping up and next steps
Dehydrating cherry tomatoes in the oven is a game-changer—turning fresh, juicy bites into intense, flavor-packed gems that last for months! With just a few simple steps, you’ve unlocked a pantry staple that’s perfect for salads, pastas, or snacking straight from the jar. 🌟
Now that you’re ready to dry your tomatoes, why not elevate your skills further? Try experimenting with herbs, spices, or even balsamic glaze for unique twists. Happy dehydrating—your future meals (and taste buds) will thank you!