
Vegetables
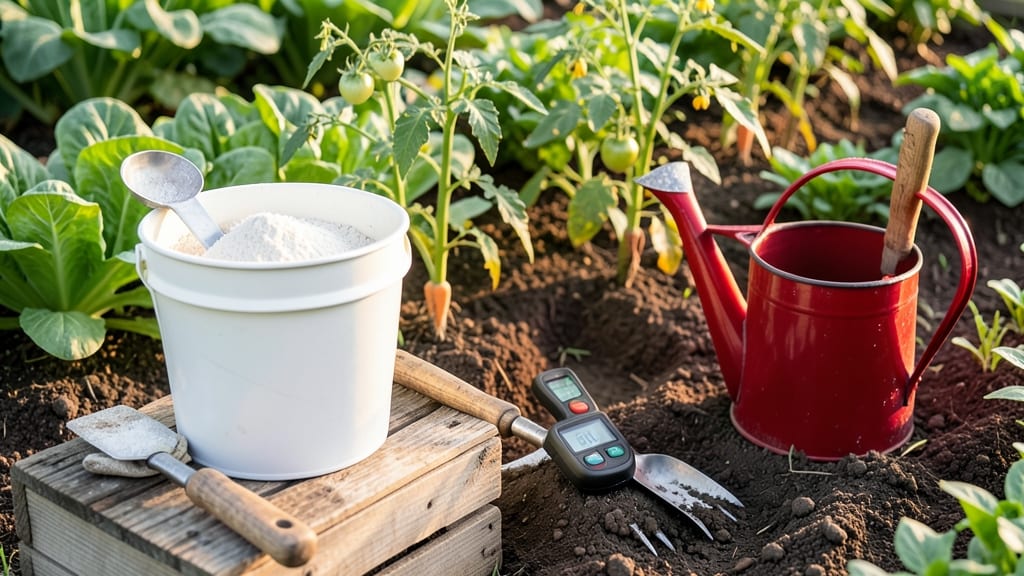
Adding lime to soil for vegetables isn’t just about fixing acidity—it’s about unlocking the full potential of your garden with a simple, one-time adjustment that pays off for years.
Most gardeners skip this step because they don’t realize how subtle the signs are: tomatoes with blossom-end rot, peppers refusing to set fruit, or lettuce bolting too fast.
A quick pH test (under $20) reveals the truth—then it’s just a matter of applying the right type of lime at the right rate. Pelletized lime works fastest, while agricultural lime takes longer but lasts. Either way, you’ll see stronger stems, deeper green leaves, and healthier harvests within weeks.
The best part? You don’t need a chemistry degree. A 1-pound bag of lime per 100 square feet is a solid starting point for most soils, and reapplying every 2–3 years keeps your garden thriving.
Just avoid overdoing it—too much lime can create its own problems, like locking out micronutrients like iron. We’ll walk you through the exact steps to get it right the first time.
Whether you’re dealing with clay-heavy soil in the Pacific Northwest or sandy ground in the Southeast, this hack works everywhere. By the end, you’ll know exactly how to test, amend, and maintain your soil for vegetables that grow like they’re on steroids—without the guesswork.
Let’s get your garden back in balance.
📚 In This Guide
- What you need
- Instructions
- Tips and common mistakes
- Wrapping up and next steps
What you need
- ● Garden lime (calcium carbonate): Quantity: 10–20 lbs per 100 sq ft (adjust based on soil test results—see soil test section for guidance).
- ● Specification: Pelletized lime (recommended for even distribution) or powdered lime (cheaper but messier). Avoid quicklime or hydrated lime—these are too potent for gardens!
- ● Garden gloves: Heavy-duty nitrile or leather gloves to protect your hands from lime dust.
- ● Garden rake or broadfork: For mixing lime into the top 6–8 inches of soil.
- ● Watering can or hose: To dampen soil slightly before and after applying lime (helps it integrate better).
- ○ Soil pH test kit: To check your soil’s current pH before and after liming (optional but highly recommended).
- ● Measuring scoop or bucket: For precise lime application (a 5-gallon bucket works well for pelletized lime).
- ● Compost or organic matter: Mix in 1–2 inches of compost after liming to buffer soil pH and improve texture.
- ● Soil moisture meter: Ensures your soil is slightly moist (not soggy) before applying lime.
- ● Broadcast spreader: For large gardens—saves time and ensures even coverage.
- ● Face mask: If working with powdered lime in windy conditions to avoid inhaling dust.
Step-by-Step instructions for balancing soil pH with lime
Here’s how I adjust soil pH for vegetables—no guesswork, just science-backed results.
Test Soil pH Before Applying Lime
Use a soil pH test kit to determine your current pH level. Most vegetables thrive in a slightly acidic to neutral range of 6.0 to 7.0. If your test shows below 6.0, your soil needs lime to raise the pH. Take notes on the exact reading—this tells you how much lime to apply.
I like to test in multiple spots across the garden, especially if you have different soil types or areas with varying sunlight. For example, a shady corner might test lower than a sunny bed. Adjust lime amounts based on the lowest pH reading in the area you’re treating.
Choose the Right Type of Lime for Your Soil
There are three main types of lime: pelletized, agricultural (powdered), and dolomitic. Pelletized lime is easiest to spread and works quickly, while agricultural lime is cheaper but can clump. Dolomitic lime adds magnesium, which is helpful if your soil tests low in that mineral.
For most vegetable gardens, pelletized lime is the simplest choice. It spreads evenly and dissolves faster, so you’ll see pH changes within 4-6 weeks. Avoid quicklime (calcium oxide)—it’s too potent and can burn plant roots if not mixed properly.
Apply Lime Evenly Across the Garden Bed
Spread lime evenly over the soil surface using a broadcast spreader or by hand with a garden rake. For a 100-square-foot area, use about 5-10 pounds of pelletized lime if your soil pH is below 6.0. If your pH is between 5.5 and 6.0, start with 3-5 pounds and retest in a few weeks.
Work the lime into the top 2-3 inches of soil with a rake or tiller. This ensures it mixes thoroughly with the soil particles. Avoid applying lime too deeply—it won’t raise the pH effectively. Water the area lightly after spreading to help it settle into the soil.
Wait and Retest Before Planting
Lime takes time to adjust soil pH—wait at least 2-3 months before planting vegetables. During this time, the lime reacts with the soil to neutralize acidity. If you’re in a hurry, you can lightly cultivate the soil every few weeks to speed up the process, but don’t overdo it.
After the waiting period, retest the soil pH with your kit. If it’s still too low, apply a smaller amount of lime (about half of what you used initially) and wait another month. Over-applying lime can make the soil too alkaline, which is just as harmful as acidity.
Monitor Soil pH Annually for Long-Term Success
Soil pH isn’t a one-time fix—it changes over time due to rain, organic matter breakdown, and plant uptake of nutrients. Test your soil every spring before planting and adjust lime as needed. Most vegetable gardens need a top-up of lime every 2-3 years to maintain optimal pH.
Keep a garden journal to track pH changes and lime applications. Note which crops thrive in your adjusted soil—this helps you fine-tune future adjustments. For example, if your tomatoes always struggle, a slight pH tweak might be the missing piece.
Tips & tricks for perfect soil pH adjustment
Adjusting soil pH with lime doesn't have to be complicated—just strategic. These insights will help you avoid common pitfalls and get the most out of your soil amendment process.
Precision Testing Pays Off: When testing soil pH in Step 1, take multiple readings across your garden—especially in different light exposures. I once missed a low-pH spot in my shade garden that was stunting my lettuce growth. The key is to adjust lime amounts based on the lowest reading rather than averaging. This ensures every plant gets optimal conditions rather than some areas being over- or under-treated.
Lime Type Matters More Than You Think: In Step 2, don't underestimate the differences between lime types. While pelletized lime is easiest for most gardeners, dolomitic lime becomes valuable if your soil test reveals magnesium deficiency (look for signs like yellowing between leaf veins). For quick results, pelletized lime shows visible pH changes within those 4-6 weeks mentioned—just be patient and avoid the temptation to add more too soon.
Application Technique Determines Effectiveness: The even distribution in Step 3 is where many gardeners fall short. Use a broadcast spreader for large areas, but for smaller beds, I find a simple garden rake works better—it gives me more control over how deeply the lime penetrates. Remember, we're targeting just the top 2-3 inches of soil. Too deep, and the lime won't do its job efficiently. A light watering after application helps settle it into place without washing it away.
Patience Prevents Common Mistakes: The 2-3 month waiting period in Step 4 is non-negotiable for safety. I've seen gardeners rush this process and end up with plants struggling in overly alkaline soil. If you're impatient, consider planting fast-growing cover crops like clover during this period—they'll help stabilize the soil while you wait. And when you do retest, be methodical: compare the new reading to your original target range of 6.0 to 7.0 before making any additional applications.
Pro Tips for Adding Lime To Soil For Vegetables
- Adjusting soil pH with lime doesn't have to be complicated—just strategic. These insights will help you avoid common ...
- Precision Testing Pays Off: When testing soil pH in Step 1, take multiple readings across your garden—especially in d...
- Lime Type Matters More Than You Think: In Step 2, don't underestimate the differences between lime types. While pelle...
Frequently asked questions
Got questions about balancing your soil with lime? You’re not alone! Here are some of the most common concerns—plus straightforward answers to keep your veggie patch thriving.
How do I know if my soil needs lime?
Test your soil’s pH first! Aim for a range of 6.0–7.0 for most vegetables. If your soil pH is below 6.0 (acidic), lime can help. Home test kits or a local extension office can provide precise readings. Leaf yellowing or stunted growth? That’s often a sign your plants are craving lime!
When is the best time to add lime to my vegetable garden?
Add lime in early fall (3–4 months before planting) or late winter for the best results. This gives the soil time to neutralize. If you’re planting in spring, apply lime at least 6 weeks beforehand—rushing it can burn plant roots. Pro tip: Avoid adding lime right before harvest to prevent over-correcting pH.
Is there a cheaper alternative to lime for raising soil pH?
While wood ash (from untreated wood) can raise pH temporarily, it’s not as effective or long-lasting as lime. Other options include crushed oyster shell or calcitic hydrated lime, but these vary in potency. For consistent results, pelletized lime is the most budget-friendly and easy-to-handle choice.
What happens if I add too much lime to my soil?
Overdoing lime can make your soil too alkaline (pH > 7.5), locking out nutrients like iron, manganese, and phosphorus—even if they’re in the soil. Signs include yellowing leaves with green veins or poor growth. If this happens, amend with sulfur or peat moss to lower pH gradually. Always follow package rates for your soil type!
Can I add lime directly to the planting hole?
Not recommended! Mix lime into the top 6 inches of soil and water it in thoroughly before planting. Direct contact with roots can cause burns or uneven pH levels. For container gardens, blend lime into the potting mix before adding plants. Patience pays off—your veggies will thank you!
Wrapping up and next steps
Adding lime to your vegetable garden is a simple yet powerful way to create the perfect growing conditions for thriving plants. By balancing soil pH and boosting nutrient availability, you’ll unlock healthier roots, stronger stems, and bountiful harvests—without breaking the bank! 🌱✨
Ready to take the next step? Start with a small test patch, monitor your soil’s progress, and adjust as needed. Your future veggie feasts will thank you—one happy plant at a time!